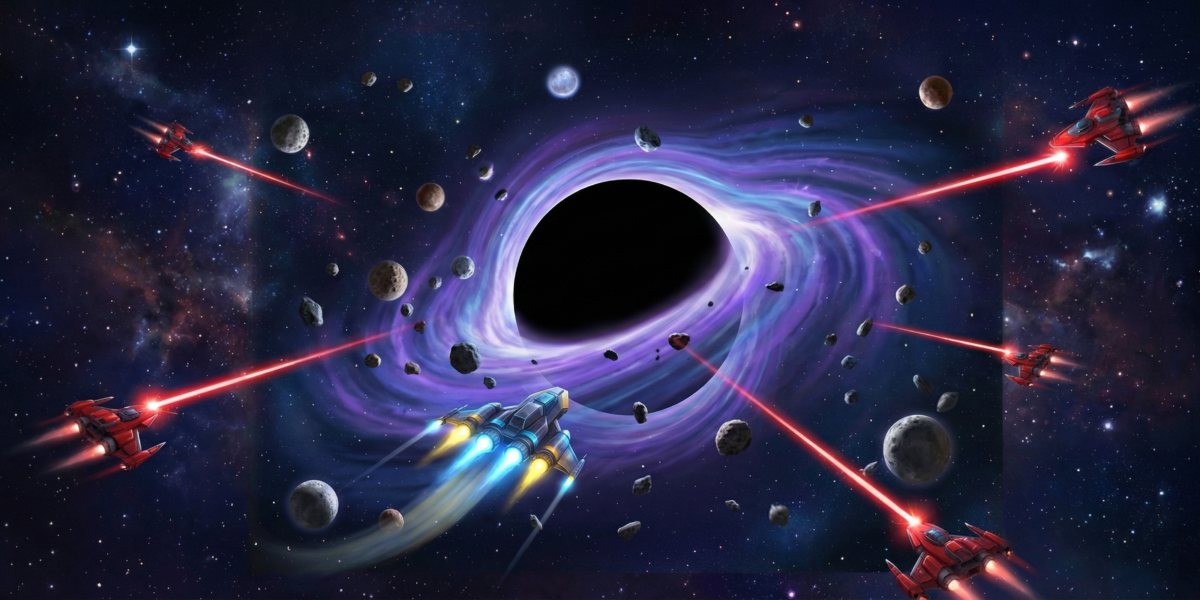
Escape mode flips everything you know about Consuming Void on its head. You’re no longer the predator — you’re the prey. Instead of controlling a black hole, you pilot a small ship trying to survive waves of obstacles and hostile black holes that want to consume you. It’s fast, it’s tense, and it’s the mode that will test your reflexes more than anything else in the game.
The Escape Mode Mindset
The first thing you need to do is forget everything about growth and consumption. In Escape mode, you don’t get bigger. Your ship stays the same size from start to finish. Your only objectives are to survive as long as possible and navigate through increasingly dangerous waves of threats.
This mode is about awareness, reaction time, and pattern recognition. Black holes move in predictable patterns, obstacles spawn in waves, and the environment gives you cues about what’s coming next. Players who treat Escape mode as random chaos will never last long. Players who learn to read the patterns will find themselves surviving far longer than they thought possible.
Ship Controls and Movement
Your ship controls differently from the black hole. It’s lighter, faster, and more responsive, but it also has momentum. When you change direction, there’s a brief drift before your ship commits to the new heading. This momentum is both your greatest tool and your biggest risk.
Learning to work with the momentum instead of fighting it is essential. Sharp turns at high speed send you sliding. Instead, start your turns early and let the drift carry you into position. Experienced Escape mode players make movements that look smooth and flowing — that’s not style, it’s efficiency. Every sharp correction wastes time and puts you at risk.
Your ship’s speed is constant — you don’t have acceleration control like the black hole’s cursor-distance mechanic. What you do control is direction, and that means your positioning before threats arrive is everything. If you’re already in a good position when a new wave spawns, you’ll sail through it. If you’re out of position, you’ll be scrambling.
Understanding Threat Types
Escape mode throws several distinct threats at you, and knowing each one’s behavior is critical.
Wandering Black Holes are the most common threat. They drift across the play area in relatively straight paths with slight course corrections. They’re not actively chasing you — they move on their own trajectories. The danger comes from their quantity. A single wandering black hole is easy to avoid. Eight of them crossing the screen simultaneously is a different story.
Tracking Black Holes are the ones that actively pursue your ship. They’re slower than wandering black holes but relentlessly follow your position. They can’t be outrun indefinitely — they’re a pressure mechanic designed to keep you moving. The key is to not let them cluster behind you. If three tracking black holes are all following you in a line, a sharp turn separates them and gives you space.
Obstacle Fields are static or slow-moving zones of debris. They don’t chase you, but they restrict your movement. When an obstacle field spawns, the safe playable area shrinks. These fields often appear in combination with active black holes, creating situations where you need to navigate precisely through narrow gaps while threats close in.
Pulsing Zones expand and contract rhythmically. They’re safe to cross during their contracted phase but deadly when expanded. Learning their timing lets you use them as shortcuts — cutting through a pulsing zone at the right moment can save you from a pursuing black hole.
Wave Structure and Escalation
Escape mode is organized into waves, though the transitions between them are seamless. Each wave introduces either more threats, faster threats, or new threat combinations. Understanding the escalation pattern helps you prepare.
The early waves (roughly the first 30-60 seconds) are your warm-up. A few wandering black holes cross the screen with wide spacing. Use this time to find your rhythm and establish your movement patterns. Don’t sit in the center — start moving early and get comfortable with your ship’s momentum.
Mid-game waves (1-3 minutes) introduce tracking black holes alongside the wandering ones. This is where most players fail their first several runs. The instinct is to focus entirely on the tracker, but that causes you to fly directly into a wandering black hole’s path. Split your attention: primary awareness on the trackers, peripheral awareness on everything else.
Late-game waves (3+ minutes) combine everything with increased density and speed. Obstacle fields narrow the play area, pulsing zones create timing challenges, wanderers fill the open space, and trackers keep you from camping in one spot. Surviving past three minutes requires genuine mastery of all the mechanics.
Core Survival Strategies
The Perimeter Loop. The single most effective strategy for consistent survival is looping the play area’s perimeter. Moving in a large oval around the edges gives you maximum visibility of incoming threats and keeps tracking black holes strung out behind you. When the perimeter gets blocked by obstacles, you’ll need to cut through the middle, but return to the edges as soon as possible.
The Bait and Switch. When multiple trackers are on you, lead them in one direction, then sharply cut perpendicular. The trackers’ momentum carries them past your turning point, giving you breathing room. This is your primary escape tool for tracker management. Do it regularly to prevent tracker buildup.
Gap Reading. When wandering black holes cross the screen, look for the gaps between them. Your ship is small — it can fit through spaces that look impossibly tight. Train yourself to spot and commit to gaps rather than trying to navigate around entire groups of threats. Hesitation in the gap is deadlier than committing to it.
Predictive Positioning. Always be thinking one step ahead. Where will the threats be in two seconds? Where should you be to have the most options? If you’re reacting to current positions, you’re already behind. Good Escape mode players are constantly repositioning to where they’ll need to be, not where they need to be right now.
Advanced Techniques
The Tracker Carousel. When you have 3+ trackers, you can arrange them into a chain behind you by maintaining consistent circular movement. The trackers follow your exact path with slight delay, creating a snake-like chain. This chain is predictable and manageable — much better than having trackers approach from multiple angles.
Obstacle Surfing. Obstacle fields have edges, and you can ride along those edges to use them as barriers against pursuers. A tracker can’t path through an obstacle field, so placing obstacles between you and your pursuers buys time and creates separation.
Emergency Stops. Sometimes the best move is the smallest move. When threats converge from all directions, making a tiny circle in a safe pocket is better than dashing through a closing gap. The wanderers will pass, the pulsing zone will contract, and a new escape route will open. Patience under pressure is a survival skill.
Screen Edge Awareness. Threats that leave the screen boundaries wrap around or despawn depending on the type. Knowing which threats wrap (trackers always do) and which despawn (some wanderers do) affects your evasion strategy. Leading a despawning wanderer off-screen is a valid tactic.
Scoring and Personal Records
Escape mode scores are based purely on survival time. The timer starts when the first wave spawns and stops when your ship is consumed. The scoring is simple, but the leaderboard is competitive because survival time improvements get exponentially harder. Going from 30 seconds to 60 seconds is relatively easy. Going from 3 minutes to 4 minutes requires significantly better play.
Track your personal records and watch for plateau points — specific wave compositions where you consistently die. Identifying your weak point lets you practice specifically for that situation. If tracking black holes consistently get you at the 90-second mark, spend your next few runs focusing exclusively on tracker management, even if it means worse performance in other areas temporarily.
The Zen of Escape
There’s something almost meditative about a good Escape mode run. Once you’ve internalized the patterns and your movement becomes instinctive, the mode enters a flow state where you’re no longer consciously deciding where to move — you’re just reacting with fluid precision.
That flow state is what Escape mode is really about. The early runs are chaotic and frustrating. The mid-skill runs are tense and deliberate. The expert runs are smooth and almost beautiful to watch. Your ship traces graceful arcs through impossible gaps, trackers trail behind like ribbons, and the threatening void that once seemed overwhelming becomes your playground.
Escape mode is Consuming Void’s hardest challenge, but it’s also its most rewarding mastery experience. Every second you add to your personal best is earned through genuine skill improvement. Keep at it, learn the patterns, and eventually the black holes won’t be able to catch you.